

Homemade Paint Recipe - Flour Paint
.jpg)
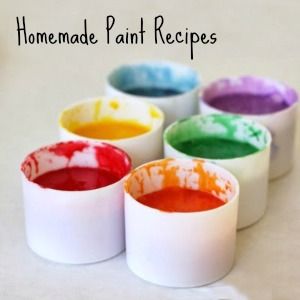
We have a nice supply of store bought paint, but I almost always find myself whipping up my own. Why? Because it's so much fun experimenting with everyday items and adding different textures and changing up consistencies. You can find our full list of homemade paint recipes here, and then read on to see how we made our rainbow flour paint.
.JPG)
How to Make Rainbow Flour Paint
This post contains affiliate links. Here is my full disclosure policy.
Supplies:
.JPG)
Directions: Okay, I feel like I say this all the time, but it's true! These paints were so easy to make. The only hard part was keeping my two year old twins entertained while I mixed them up. I didn't use exact measurements, but I put roughly 1/4 cup of flour in a measuring cup, added coloring and a squirt of water and mixed the paint with a whisk. Keep in mind that since this paint recipe has a flour base you will need a good amount of color. If the paint is too thick and doesn't seem like it will spread well add a little more water. Use caution not to add too much water, because the water will moisten the paper and crinkle it. Once I was happy with the consistency of each batch I added about a teaspoon of vegetable oil. The oil is optional. It gives the paint a glossier look. We don't use vegetable oil for cooking, but I buy a cheap brand to use in our play recipes. The amounts given were per color, so I made seven batches of that recipe.
.JPG)
All four of my boys loved this paint recipe. They were so excited to get started!
.JPG)
Like most paint recipes, exact measurements are not necessary. It's all about preference. Have fun experimenting! For an even glossier paint, use more oil.
.JPG)
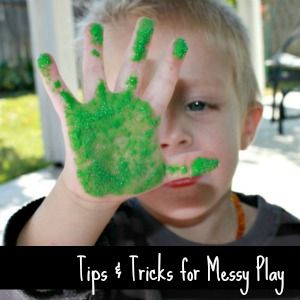
I prefer liquid watercolors over food coloring, because the colors are much more vibrant. Also, they are completely washable. Here are tips for messy play as well as laundry tips to avoid stains and keep clothes bright.
.JPG)
I will forever cherish these moments, watching my boys create together.
.JPG)
As you can see, they are more interested in the process of art rather than the final product. Most of our paintings end up looking exactly like this, and I love it.
.JPG)
Here is a good look at how the paint dried. It had a cool texture, and the colors are quite gorgeous!
.JPG)
For more homemade paint recipes follow me on Pinterest.

Other homemade paint recipes:
s.jpg)

.JPG)


Thanks for the recipe. I wonder what they would be like if you added corn syrup instead of oil.
ReplyDeleteI loved this recipe but found it very hard to clean the paint brushes after using in the flour paint. Do yo have any suggestions for easy brush clean up?.
ReplyDeleteWe had trouble the first time as well. I assumed it was because I left the paint mess while I got my little guys down for naps. Sorry you had trouble. Soaking paint brushes in vinegar for an hour or so usually works well. Soaking them in a little fabric softener also makes them easy to clean. I hope that helps!
DeleteI used the flour recipe without oil to make fingerpaint for my toddler who puts EVERYTHING in his mouth. He ended up getting it everywhere. Most of the cleanup was very easy except for where he wiped it in his hair. It clumped up in little globs in his hair and even after soaking in the tub I could only get them out by pulling a fine-toothed comb through his hair and it pulled and probably hurt a little bit. :( I loved the experience... but I think I'll just try some other creative / sensory things next time.
DeleteI think the oil would prevent it from sticking in hair. I'm sorry it ended up being a pain!
DeleteI can't wait to make these paints for my son! It's nice when you already have all the necessary supplies on hand- very simple recipe! :)
ReplyDeleteCan you save this at all?
ReplyDeleteI think you could for a day or two in an airtight container, although I haven't tried it to say for sure.
DeleteAllison this was the BEST Homemade Paint Recipe I've tried yet! It was a huge hit with the kids for rainbow painting this afternoon! Thank you so much for sharing. I will add to my tested & true homemade recipe box!
ReplyDeleteI literally just finished doing this with my 2 year old daughter, and SHE LOVED IT!!! I let her help mix and make the paint and than just let her finger paint, she went wild! I love this and such easy clean up :) It was great fot helping her learn her colors and it brought out her creative side, it was wonderful, thank you so much!!!
ReplyDeleteThese ideas are great! I wonder whether this paint recipe stains clothing or skin?
ReplyDeleteWe haven't had a problem with staining clothes. Sometimes the skin is stained temporarily, but by the next day it's gone.
DeleteProbably just thicker
ReplyDeleteCan you keep the artwork (does the paint last)?
ReplyDeleteI'm doing a project for an education course, and this recipe inspired me to do a homemade painting activity. I added corn syrup to my mixture instead of oil, and it works great! I think it might help to keep the paint a little thicker than the oil might.
ReplyDeleteThanks for the great recipe, you have tons of awesome creative ideas! (:
Will the paintings hold up? Or do they go bad after a while?
DeleteHow would this recipe work on a larger scale, say an entire bottle of the liquid watercolor, for a class or group project??
ReplyDelete